Resize m3 to t2 EC2 Instances on AWS

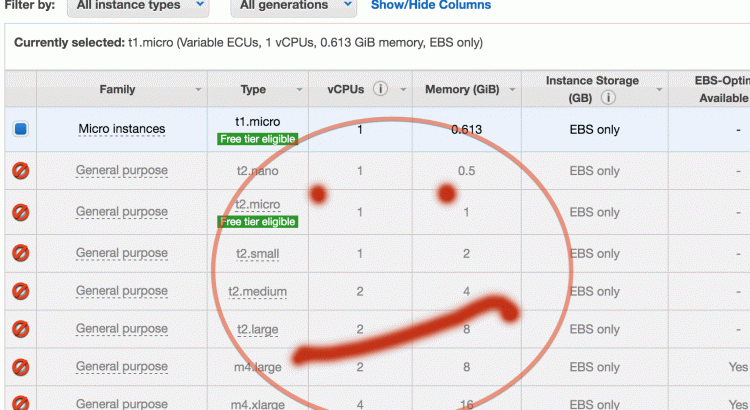
If you run a server on AWS, you may be unpleasantly surprised to discover you don’t have the option to automatically resize between all instance types. I decided to resize m3 to t2 instance types (m3.large => t2.small) when my reserved instance lease expired & my needs had changed from those of running a commercial web business to running a small blog.

Turns out, AWS has made numerous network and architecture changes since my machine image was created in 2014. What should have been a small change turned into quite a bit of work. I’ve summarized the steps below should you encounter the same issue.

EC2 instances built today (called EC2-VPC) do not work interchangeably with older generation (now called EC2-Classic) instances. Here are some key differences I encountered: Read More

Debugging Access-Control-Allow-Origin issues in Apache

Here’s how I was able to solve & debug a problem relating to a security issue that prevented iPad and Android devices from loading some of the files on my site, due to the fact that they were served by a different port. Client side (browser) tools did not provide the level of insight I needed to debug the server issue.

The problem:

I was running Django server on a port (8000) with Apache serving static files from port 80. On iPad and Android devices, my JWPlayer 6 video player was giving users an error that my custom skin file could not be found. The skin file was simply an xml file being served by Apache on the same machine, and it worked just fine on laptops, desktops, Mac and PC, but not mobile, and not tablets.

I found the underlying client problem first with Mac iOS Simulator and Safari Developer tools (and later by simply spoofing the Android user agent from my Chrome browser and checking Console errors). The error was:

XMLHttpRequest cannot load http://localhost.myhost.com/static/inc/jwsk/glow_gb.xml. No 'Access-Control-Allow-Origin' header is present on the requested resource. Origin 'http://localhost.myhost.com:8000' is therefore not allowed access.

I found a number of reports on the issue, including this Stack Overflow post. To correct my problem, I needed to setup CORS (Cross-Origin Resource Sharing) via some Apache directives.

I verified that the loosest setting in Apache did indeed fix the problem, so I was on the right track:


<FilesMatch ".xml$">
    Header set Access-Control-Allow-Origin *
</FilesMatch>


However I wanted stricter security in place, to not allow any old hostname to match. Based on some misleading statements in the StackOverflow thread, I believed I could use multiple lines for this Response Header, using environment variables to generate different combinations of host & port that I wanted to allow. I tried dozens of combinations unsuccessfully and struggled to figure out how to debug the apache behavior. Finally I found
this post (http://archive.ianwinter.co.uk/2010/11/18/log-response-headers-in-apache/) which got me headed in the right direction.

Debugging the issue

I added the following lines to my apache conf file, to emit to my logs both the environment variables I was setting & request/response headers relevant to the issue:

#capture server & host from request origin
SetEnvIf Origin "^(.*.?myhost.com)(:[0-9]+)?$" ORIGIN_0=$0 ORIGIN_1=$1 ORIGIN_2=$2
# add variations of incoming host/port to the response headers
<FilesMatch ".xml$">
    Header set Access-Control-Allow-Origin "%{ORIGIN_0}e" env=ORIGIN_0
    Header set Access-Control-Allow-Origin "%{ORIGIN_1}e" env=ORIGIN_1
</FilesMatch>

#emit request "Origin" header, response "Access-Control-Allow-Origin” header, and my 3 environmental variables to each line of the log
LogFormat "%h %l %u %t "%r" %>s %b ORIG="%{Origin}i" ALLOW="%{Access-Control-Allow-Origin}o" O0="%{ORIGIN_0}e" O1="%{ORIGIN_1}e" O2="%{ORIGIN_2}e"” common2

#use my custom log format 
CustomLog /var/log/django/prototype_access.log common2

After restarting apache, my apache logs now showed output like this when I reloaded an affected page:

127.0.0.1 - - [15/Mar/2014:13:41:26 -0700] "GET /static/inc/i/logo2.png HTTP/1.1" 304 - ORIG="-" ALLOW="-" O0="-" O1="-" O2="-"
127.0.0.1 - - [15/Mar/2014:13:41:26 -0700] "GET /static/inc/i/unlimited.png HTTP/1.1" 304 - ORIG="-" ALLOW="-" O0="-" O1="-" O2="-"
127.0.0.1 - - [15/Mar/2014:13:41:26 -0700] "GET /static/inc/jwsk/glow_gb.xml HTTP/1.1" 304 - ORIG="http://localhost.myhost.com:8000" ALLOW="http://localhost.myhost.com:8000"  O0="http://localhost.myhost.com:8000" O1="http://localhost.myhost.com" O2=":8000"

Eureka.

The Solution

I could verify via apache logs that my environmental variables were working as expected. My problem was that only one of my Access-Control-Allow-Origin headers was taking effect, and not the right one. I needed to Allow origins without the Django port.
Once I removed the extra lines, I was left with this configuration, which solved my problem by enabling the Apache host (without the django port) in a single response header directive.


SetEnvIf Origin "^(.*.?myhost.com)(:[0-9]+)?$" ORIGIN_1=$1 
<FilesMatch ".xml$">
    Header set Access-Control-Allow-Origin "%{ORIGIN_1}e" env=ORIGIN_1
</FilesMatch>

My final apache logs looked like this:

127.0.0.1 - - [15/Mar/2014:13:41:26 -0700] "GET /static/inc/jwsk/glow_gb.xml HTTP/1.1" 304 - ORIG="http://localhost.myhost.com:8000" ALLOW="http://localhost.myhost.com" O0="http://localhost.myhost.com:8000" O1="http://localhost.myhost.com" O2=":8000"

Setting up SSL on Mountain Lion (Mac OSX 10.8)

Note: For my mac dev box, I load my custom Apache configurations in a standalone file, e.g. /etc/apache2/other/mysites.conf. I tend to leave the default apache files in place for reference. You may prefer to edit or replace the default files instead.

I started by reading this set of instructions, but had to workaround a few other issues to get https working.  Here are the full steps I used.

Steps

1. Per my last post about setting up https in production, generate a   private key this way (if you don’t have the one for production):

$ openssl req -nodes -newkey rsa:2048 -keyout mysslprivatekey.key -out localhost_mycompany.csr
Generating a 2048 bit RSA private key
.............................................+++
.......................+++
writing new private key to 'mysslprivatekey.key'
-----
You are about to be asked to enter information that will be incorporated
into your certificate request.
What you are about to enter is what is called a Distinguished Name or a DN.
There are quite a few fields but you can leave some blank
For some fields there will be a default value,
If you enter '.', the field will be left blank.
-----
Country Name (2 letter code) [AU]:US
State or Province Name (full name) [Some-State]:California
Locality Name (eg, city) []:MyTown
Organization Name (eg, company) [Internet Widgits Pty Ltd]:My Company
Organizational Unit Name (eg, section) []:
Common Name (e.g. server FQDN or YOUR name) []:www.mycompany.com
Email Address []:
Please enter the following 'extra' attributes
to be sent with your certificate request
A challenge password []:
An optional company name []:
    

Note I didn’t set a password, email, or anything optional.

2. With that private key, create a local certificate. (Note that I use the hostname localhost.mycompany.com for my browser testing in development.  I have an entry in my /etc/hosts file pointing this name to 127.0.0.1. Using the FQDN for localhost allows access to full cookie functionality.)

$ openssl req -new -x509 -key mysslprivatekey.key -out localhost_mycompany_com.crt -days 1095
You are about to be asked to enter information that will be incorporated
into your certificate request.
What you are about to enter is what is called a Distinguished Name or a DN.
There are quite a few fields but you can leave some blank
For some fields there will be a default value,
If you enter '.', the field will be left blank.
-----
Country Name (2 letter code) [AU]:US
State or Province Name (full name) [Some-State]:California
Locality Name (eg, city) []:MyTown
Organization Name (eg, company) [Internet Widgits Pty Ltd]:My Company
Organizational Unit Name (eg, section) []:Common Name (e.g. server FQDN or YOUR name) []:localhost.mycompany.com
Email Address []:

3. Copy the *.csr, *.key, and *.crt file to a directory for apache, creating it if doesn’t exist:

sudo mkdir /etc/apache/ssl
sudo cp *.csr *.key *.crt /etc/apache/ssl

4. I had some trouble getting port 443 working. I could see it wasn’t listening when I ran the command

netstat -nap tcp|grep 443

When everything is working correctly, you should see something like this line in your netstat output:

tcp46      0     *.443      *.*       LISTEN

I tried a number of things, including verifying that I had no Firewall turned on (System Preferences > Security & Privacy > Firewall). In the end, all I needed to do was uncomment the following Include line in /etc/apache2/httpd.conf

Include /private/etc/apache2/extra/httpd-ssl.conf

Verify that mod_ssl is being loaded by this line in the file:

LoadModule ssl_module libexec/apache2/mod_ssl.so

5. Verify the following critical items in /etc/apache2/extra/httpd-ssl.conf or in your configuration flow.

# this is the line needed to get your server listening on port 443, and see it in netstat

Listen 443

# comment out the default lines which point to non-existent files, and insert your own real paths:

#SSLCertificateFile "/private/etc/apache2/server-dsa.crt"
#SSLCertificateKeyFile "/private/etc/apache2/server-dsa.key"
SSLCertificateFile "/private/etc/apache2/ssl/localhost_mycompany_com.crt"
SSLCertificateKeyFile "/private/etc/apache2/ssl/mysslprivatekey.key"

Note – I tried skipping these 2 lines *in this file* since I use them later, but this caused https to fail, with this error in error.log:

Server should be SSL-aware but has no certificate configured [Hint: SSLCertificateFile] (/private/etc/apache2/extra/httpd-ssl.conf:74)

6. Now in your main configuration area (in my case  /etc/apache/other/mysites.conf), add the following:

#! without this line, https requests were going to the wrong DocumentRoot (from the default VirtualHost). You could also put this line in httpd-ssl.conf presumably

NameVirtualHost *:443

#This is the main configuration block to add

#remove the space after the start and end VirtualHost tags. removed for tumblr's sake.
<VirtualHost *:443>
SSLEngine on
ServerName localhost.mycompany.com

#next 2 lines are dupes from http-ssl.conf, but https fails without them with connection refused
SSLCertificateFile "/private/etc/apache2/ssl/localhost_gigabody_com.crt"
SSLCertificateKeyFile "/private/etc/apache2/ssl/mysslprivatekey.key
</VirtualHost>

7. Restart Apache

sudo /usr/sbin/apachectl restart

8. Open your browser and test for your particular domain

The first time you hit https, you’ll get an error that the certificate is untrusted, ignore it and allow the browser to use it, since you know it’s safe. These 2 urls should  both work and bring up the same default page, when everything is working.

9. For general troubleshooting, you can check out the Apache error log. I see these warnings in my error.log, but they are safely ignored in development.

[warn] RSA server certificate is a CA certificate (BasicConstraints: CA == TRUE !?)
[warn] RSA server certificate CommonName (CN) `localhost.mycompany.com' does NOT match server name!?
Setting up SSL on Apache (with Ubuntu12 + AWS)

Today I added SSL to my Apache webserver, running on Ubuntu 12, on an AWS instance. This was the first time I’d ever worked with SSL or certificates and it was fairly straightforward though it seemed daunting at first. Ran into a few problems that the Internet didn’t solve for me, so I thought I’d share.

My sequence end to end:

1. When I bought my domain name through Namecheap, it came with an SSL certificate, which I had never activated. Namecheap apparently subcontracts SSL services to a company called Comodo.  You’ll presumably need to purchase a trusted certificate from an authority like Comodo or DigiCert if you don’t already have one for your production site.

2. In preparation for using SSL, I added HTTPS (port 443) to my EC2 Security Group to allow traffic through the firewall. This is in the AWS Management Console ( EC2 -> Security Groups in left nav -> select the group in use by your server instance, click Inbound tab, HTTPS is listed in the dropdown of pre-configured rules you can add).  Here’s what it looks like after you add it:

image

3. I followed the instructions here to generate a private key (myprivatekey.key) and csr file (myserver.csr), saving them to a special directory for safekeeping. Basically this consisted of running:

openssl req -nodes -newkey rsa:2048 -keyout myprivatekey.key -out myserver.csr

Note that I’m using Apache 2 with mod_ssl. Instructions for other OS/webserver configurations are here . 

4. I submitted my generated csr to Namecheap through their web form, clicked on an approval email they sent, then received my certificate files by email from Comodo. They sent me a zip containing 2 files:

  • www_myserver_com.crt
  • www_myserver_com.ca-bundle

5. Next I roughly followed the instructions here to setup the SSL files in production. For other OS/webserver configs, you can look here. For my setup, this consisted of

  • a. uploading myprivatekey.key file and the zip with the certificate files to AWS, then unzipping the certificate files
  • b. copying the private key under /etc/ssl/private
  • c. copying the 2 unzipped certificate files under /etc/ssl/certs

6.  Rather than mucking with Apache’s default config files, I typically load my own Apache .conf file that lives in: /etc/apache2/conf.d/mydomain.conf . To enable SSL, I edited mydomain.conf file, adding the block below.

#remove the space after the < brackets in the Virtual Host open/close tags. 
#   Tumblr forces me to add it.
<VirtualHost *:443>
 SSLEngine on
 ServerName myserver.com
 SSLCertificateKeyFile /etc/ssl/private/mysslprivatekey.key
 SSLCertificateFile /etc/ssl/certs/www_myserver_com.crt
 SSLCertificateChainFile /etc/ssl/certs/www_myserver_com.ca-bundle
</VirtualHost>

I already had entries for port 80, so I just had to add port 443. The Document Root and LogFile locations were inherited from elsewhere in my config, which was fine for my purposes.

7. Enabled ssl for Apache by symlinking the available module under the enabled modules directory, then restarted apache:

 $ pushd /etc/apache2/mods-enabled/
 $ sudo ln -s ../mods-available/ssl.conf ssl.conf
 $ sudo ln -s ../mods-available/ssl.load ssl.load
 $ sudo /usr/sbin/apachectl restart

8. restarted apache and tailed my access.log and error.log to check for problems.

tail -n30 /var/log/apache2/access.log
tail -n30 /var/log/apache2/error.log

Note that I had originally included the following lines in my .conf file (without the # signs to comment them out), but they caused problems.

#NameVirtualHost *:80
#NameVirtualHost *:443
#Listen *:80
#Listen *:443

I removed these lines because they broke Apache restart and yielded these errors:

[Wed Jun 26 23:04:57 2013] [warn] NameVirtualHost *:443 has no VirtualHosts
[Wed Jun 26 23:04:57 2013] [warn] NameVirtualHost *:80 has no VirtualHosts
(98)Address already in use: make_sock: could not bind to address 0.0.0.0:80
no listening sockets available, shutting down

Basically, because I left Apache’s default configuration in place and was using a supplementary conf file, my lines were duplicates of lines in Apache’s /etc/apache2/ports.conf file.  You’ll need the Listen port lines somewhere in your Apache configuration to get things working properly, but not loaded twice if you want everything to start!

I still see this additional warning in my error.log at startup, but safely disregard it since it does not impact functionality. I leave my instance hostname as AWS has configured it.

RSA server certificate CommonName (CN) `www.myserver.com' does NOT match server name!?

9. To verify everything was working properly with my SSL certificate, I first ran a check of my website’s certificate configuration here: http://www.digicert.com/help/

10. I then doublechecked that both of these urls worked for my server, and that my apache access.log showed requests with port 80 and port 443 in use respectively.

http://www.myservernamehere.com

https://www.myservernamehere.com

Next up: getting an SSL certificate to work in my dev environment, not nearly so straightforward it turns out.